SolarEdge inverter via Modbus TCP connection
This guide describes step by step how to connect a SolarEdge inverter to the Currentt Navigator via Modbus TCP over the local network (Ethernet). The inverter is configured to use the SunSpec protocol.
See also: For connection via RS485 (Modbus RTU), refer to the SolarEdge Modbus RTU guide.
✅ Compatible devices
Modbus TCP is supported by all SolarEdge inverters with an Ethernet port and firmware version 3.xxxx or higher.
If the SolarEdge SetApp works with the inverter, the firmware is recent enough for Modbus TCP.
Single-phase inverters
| Model | Type | Configuration via |
|---|---|---|
| SE2200H - SE6000H | HD-Wave (compact) | SetApp |
| SE3000H - SE10000H | Home Wave | SetApp |
| SE3500 - SE6000 | Older models with display | LCD Display |
Three-phase inverters
| Model | Type | Configuration via |
|---|---|---|
| SE3K - SE33.3K | Three-phase | LCD Display / SetApp |
| SE5K - SE16K | Home Hub (three-phase) | SetApp |
Hybrid / StorEdge inverters
| Model | Type | Configuration via |
|---|---|---|
| StorEdge Single-phase | Hybrid with battery | SetApp / LCD Display |
| StorEdge Three-phase | Hybrid with battery | SetApp / LCD Display |
| SE5K-SE10K Home Hub | Hybrid with Home Battery | SetApp |
🧰 Requirements
- Currentt Navigator (connected to the local network)
- Ethernet cable (CAT5 or CAT6)
- SolarEdge inverter with Ethernet port
- Network access (both devices on the same LAN or routable network)
- SolarEdge SetApp (for modern inverters) or access to the LCD display
1️⃣ Step 1: Connect Ethernet to the inverter
Ethernet port location
The Ethernet port is located on the communication board inside the inverter. You can access it via the communication gland (cable gland) at the bottom of the inverter.
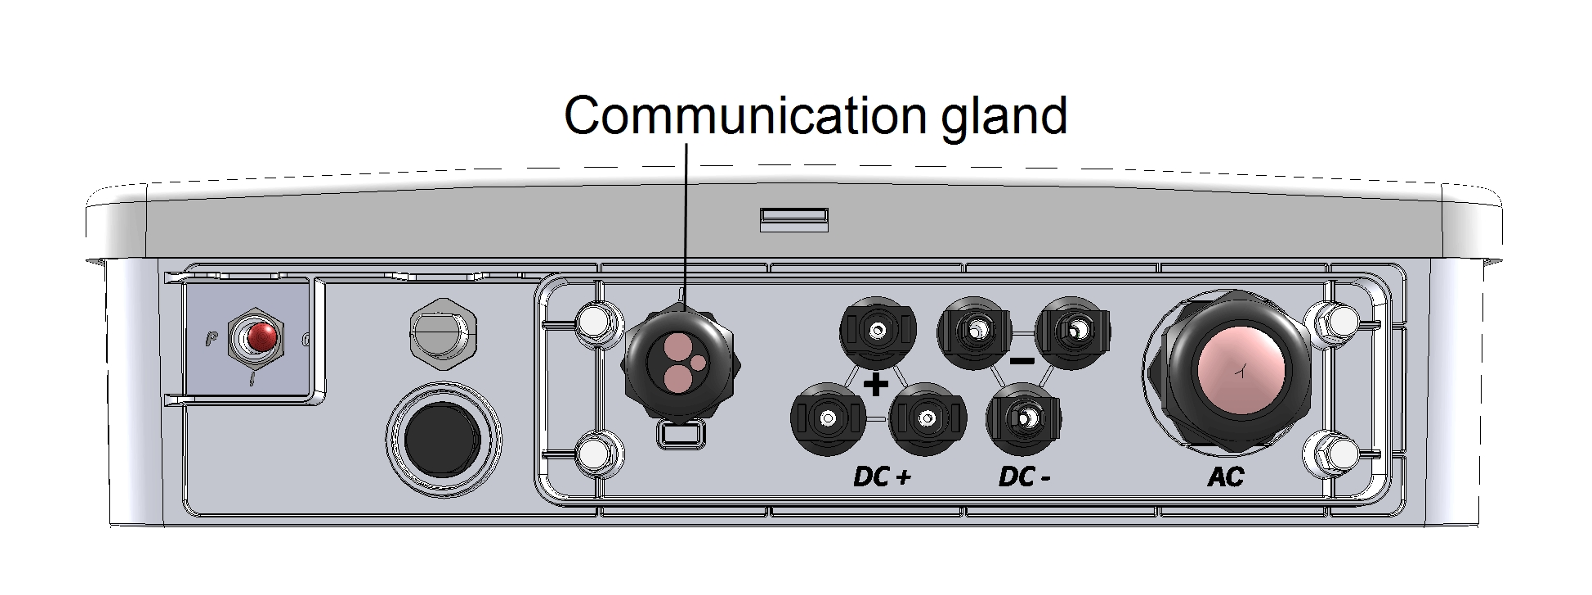
The communication gland (cable gland) at the bottom of the inverter
On some models, it is not necessary to fully open the enclosure. The Ethernet cable fits through the communication gland and can be plugged directly into the RJ45 port on the communication board.
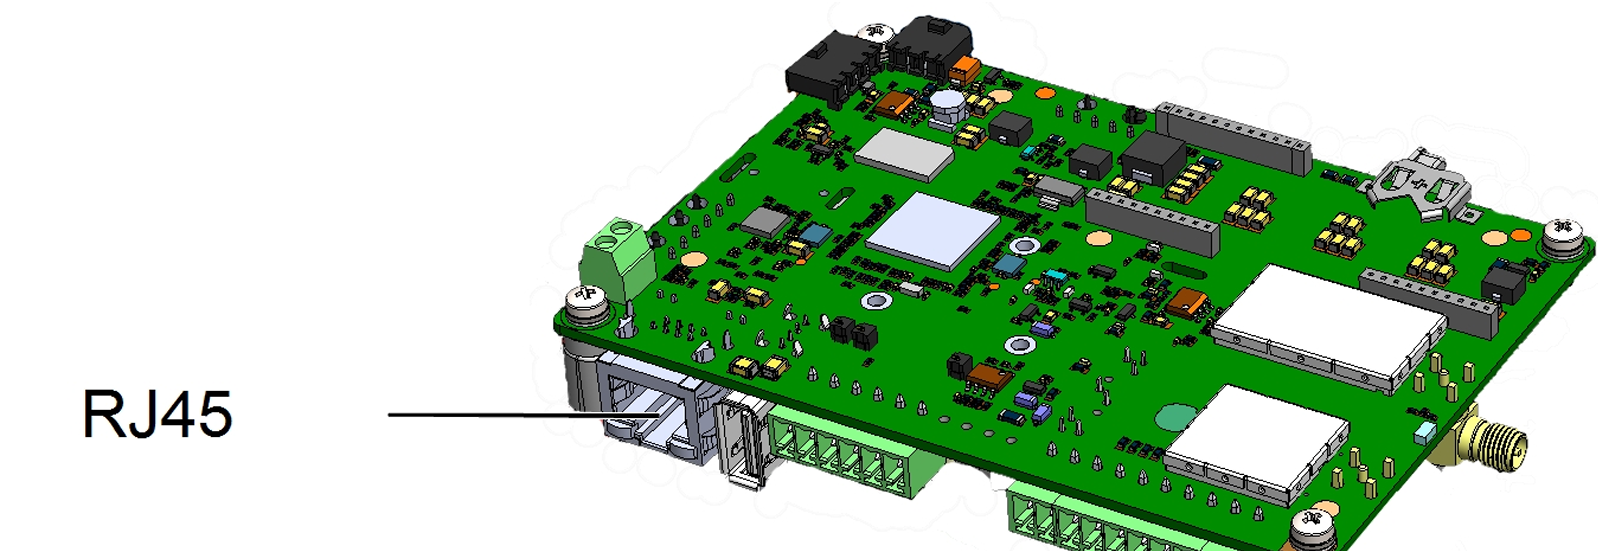
The SolarEdge communication board with the RJ45 Ethernet connector
Connection
- Route an Ethernet cable through the communication gland of the inverter
- Connect the cable to the RJ45 Ethernet port on the communication board
- Connect the other end to your network switch or router
- Ensure that the Currentt Navigator is connected to the same network
2️⃣ Step 2: Configure the inverter
Modbus TCP is disabled by default on SolarEdge inverters. You must explicitly enable it.
Option A: Configuration via SetApp (modern inverters)
Step 2A.1: Connect to the inverter
- Download the SolarEdge SetApp on your smartphone (iOS/Android)
- Briefly set the ON/OFF/P switch to P (< 2 seconds) and release — the inverter creates a WiFi access point
- Open the SetApp and scan the QR code on the inverter — the app automatically connects to the inverter's WiFi access point
Step 2A.2: Enable Modbus TCP
- Go to Commissioning > Site Communication > Modbus TCP
- Set Modbus TCP to Enable
- Note the TCP port number (default 1502)
Commissioning
  └── Site Communication
        └── Modbus TCP
              ├── Status    → Enable
              └── TCP Port  → 1502
Option B: Configuration via LCD display (older inverters)
- Set the ON/OFF/P switch to P and hold it for more than 5 seconds
- Navigate to Communication > LAN Conf > Modbus TCP
- Set Modbus TCP to Enable
- Note the TCP port number
Communication
  └── LAN Conf
        └── Modbus TCP
              ├── Status    → Enable
              └── TCP Port  → 1502
Option C: Configuration via WiFi access point (without SetApp)
This method works without SetApp or an installer account:
- Briefly set the ON/OFF/P switch to P (< 5 seconds) and release
- The inverter activates a WiFi access point
- Connect your phone or laptop to the inverter's WiFi network (SSID and password are on the inverter label)
- Open a browser and navigate to http://172.16.0.1
- Go to Site Communication > Modbus TCP
- Set Modbus TCP to Enabled
- Note the port number (usually 502 or 1502)
3️⃣ Step 3: Determine the IP address
To communicate via Modbus TCP, you need the IP address of the inverter.
Finding the IP address
The IP address can be found in several ways:
- Via SetApp: Go to Commissioning > Site Communication > Ethernet and read the assigned IP address
- Via LCD Display: Navigate to Communication > LAN Conf and read the IP address
- Via your router: Check the DHCP client list of your router
- Via the WiFi web interface (172.16.0.1): The IP address is displayed under Site Communication > Ethernet
4️⃣ Step 4: Configuration in the Currentt Navigator
After enabling Modbus TCP on the inverter, the device must be added in the Currentt Navigator. This can be done in two ways:
🪄 Via the setup wizard (recommended)
- Click the settings icon (top right of the screen)
- Choose Setup Wizard
- Follow the on-screen steps
The setup wizard guides you step by step through the complete configuration process.
Is there a battery connected to the inverter (StorEdge, Home Hub)? Indicate this when the setup wizard asks. This question will automatically appear during the steps.
⚙️ Manual configuration
- Click the settings icon (top right of the screen)
- Go to Components
- Is there a battery connected to the inverter (StorEdge, Home Hub)?
- Yes → Click the + button in the Batteries section
- No → Click the + button in the Inverters section
- Select SolarEdge
- Indicate which phase the inverter is connected to (L1, L2, or L3)
- Under Communication, select Modbus and click Network (TCP)
- Set the connection parameters:
| Parameter | Value |
|---|---|
| IP address | (IP address of the inverter) |
| Port | 1502 |
| Modbus address (Device ID) | 1 |
🔢 Port 502 vs 1502
The default port number varies by model and firmware version:
| Port | Explanation |
|---|---|
| 1502 | Most common default for recent models and SetApp |
| 502 | Standard Modbus TCP port, used on some older models |
If the connection does not work on port 1502, try port 502, or vice versa. Both ports are functionally identical.
⚠️ Limitations and considerations
Maximum 1 simultaneous connection
SolarEdge inverters support only 1 Modbus TCP connection at a time. If another system (e.g. a battery or monitoring system) is already connected, the Currentt Navigator cannot connect.
Solution: When using multiple clients, use a Modbus proxy to share the connection.
Multiple inverters via TCP
Connect each inverter individually via Ethernet. Reading multiple inverters that are interconnected via RS485 over a single TCP connection is not reliable. Each inverter needs its own Ethernet connection and unique IP address.
🛟 Troubleshooting
| Problem | Possible cause | Solution |
|---|---|---|
| No connection | Modbus TCP not enabled | Check that Modbus TCP is set to "Enable" in SetApp/display |
| No connection | Wrong IP address | Check the IP address via SetApp, display, or router |
| No connection | Wrong port | Try both port 502 and 1502 |
| Connection refused | Other client connected | Check if another system already has a TCP connection |
| Connection drops | Idle timeout (2 min) | Ensure the Currentt Navigator polls frequently enough |
| No data | Wrong Device ID | Check that the Device ID matches (default: 1) |
| Unreliable data | Multiple inverters via 1 TCP | Connect each inverter individually via Ethernet |
| No connection after restart | IP address changed (DHCP) | Set a static IP address |
📋 Settings summary
| Parameter | Value |
|---|---|
| Connection | Ethernet (LAN) |
| Protocol | Modbus TCP / SunSpec |
| Port | 1502 (or 502) |
| Device ID | 1 (default) |
| Max simultaneous connections | 1 |
| Idle timeout | 2 minutes |
| Firmware required | CPU version 3.xxxx or higher |